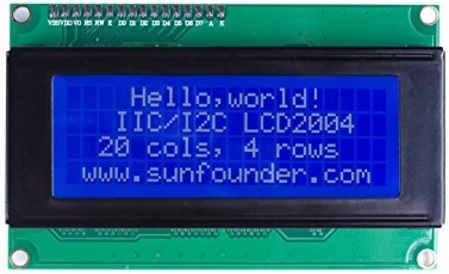
SunFounder 20x4 LCD display - quick setup.
< BACK to Arduino Projects page
Click HERE to open in a new tab full-screen if not already.
Here's my low down on this display - there are many that look like it, and I assume behave like it. This covers
what I did to to get the one that comes with the I2c interface working. Code is at the bottom of the project to
copy/paste, or you can download the .ino file. Libraries and where I found them are also included. Click HERE
to see my parts page for this component's listing.
SunFounder 20x4 LCD display
 | |
Gettting this thing to work took a bit more effort than I expected. I watched a few You Tubes just like most people since I'm
also getting started too - but they each seemed to lack perfect explanation on what to do. So I went looking for answers. Here
is what I have so far. Oh and this thing has to have 5 volts. You can power it on 3 volts from the Arduino, but it won't be bright
enough for you to see the display clearly - and the potentiometer on the back of the interface controls the contrast. Remove
the jumper to manually force the backlight off.
Note: the display discussed here has the I2c controller
card soldered on the back of the display. If you are looking to control one of these with just the 16 pinouts it may be a different
hardware setup, but I believe this review will also work. |
Note - you will need to have the I2c address for the device you are using. If you don't
know it or it's not labeled, then you will need an I2c scanner. Click HERE to get the .ino
file. Compile and upload to your Arduino after you hook up the display and the program will scan for the device and tell you the
address it is on.
First, the LiquidCrystal_I2C.zip library that I included into the Arduino IDE just would not work at all. It would complain about
the declared object not having the construtor that was being called. The method being called just didn't seem to be there. I had to have
been missing something. It wanted too few parameters for the examples I saw calling for something like this:
LiquidCrystal_I2C lcd(I2C_ADDR,En_pin,Rw_pin,Rs_pin,D4_pin,D5_pin,D6_pin,D7_pin);
It would only take the I2c address of the display, and one other parameter. The example code showed LCD.h in the includes. I
couldn't locate that and figured it might have what I wanted but it pissed me off so I moved on. I kept looking around until I found
another library that would work. The next one was New_LiquidCrystal_Library.zip - and this one didn't work out either. Finally I
ran across this gal named Francisco Malpartida. She's cute
if you believe that's her picture. I don't know guys - pretty geek girls and microprocessers that can code? Anyway, her library (NewLiquidCrystal_1.3.4.zip) worked great, and here it is to DOWNLOAD from
my library group. If you want to get to her personal reference, click HERE to check out her main breakdown on the hardware, it's particulars, and notations on the code.
Look further down on that page until you see the sort-of not-obvious download link for her latest and greatest. While you are there check out the other stuff she has worked on as well.
Once you have the library installed you can download my code HERE, or just copy
and paste it from below...
//------------------------------------------------------------------------
// LCD 20x4 example
// 01/20/17 by: Atomkey
// LCD library used: NewLiquidCrystal_1.3.4.zip
// Get the library from atomkey.net under code/AVR section
// Or - goto https://bitbucket.org/fmalpartida/new-liquidcrystal/downloads
//------------------------------------------------------------------------

#include <Wire.h>
#include <LiquidCrystal_I2C.h>

#define I2C_ADDR 0x27 // This is the I2c address of your display
                      // don't know that? google "I2c scanner" and use it first

#define Rs_pin 0      // some essential initializers - play with them and
#define Rw_pin 1      // see what happens
#define En_pin 2
#define BACKLIGHT_PIN 3
#define D4_pin 4
#define D5_pin 5
#define D6_pin 6
#define D7_pin 7

// declare an object of class type lcd
// don't know what an object is?
// https://www.tutorialspoint.com/cplusplus/cpp_classes_objects.htm

LiquidCrystal_I2C lcd(I2C_ADDR,En_pin,Rw_pin,Rs_pin,D4_pin,D5_pin,D6_pin,D7_pin);

void setup()
{
  unsigned int count = 0;     // general purpose counter

  lcd.begin (20, 4);          // <<-- LCD is 20x4, edit this to your specs

  // LCD Backlight on/off = HIGH/LOW
  lcd.setBacklightPin(BACKLIGHT_PIN, POSITIVE);
  lcd.setBacklight(HIGH);

  lcd.home ();                // reset cursor location to 0,0
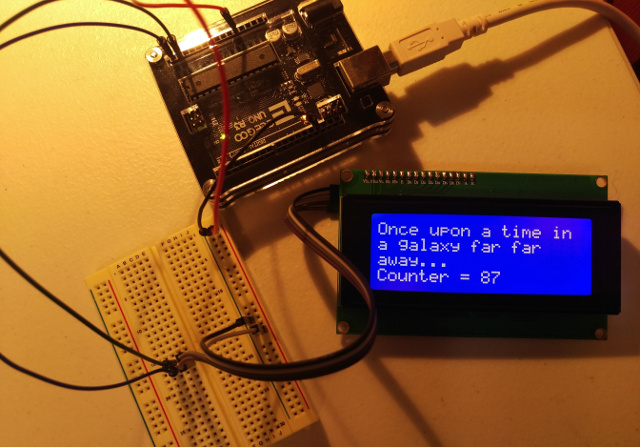
  lcd.print("Once upon a time in");
  lcd.setCursor(0,1);         // column 1 line 2 of the display
  lcd.print("a galaxy far far");
  lcd.setCursor(0,2);         // column 1 line 3 of the display
  lcd.print("away...");

  while(true)                 // perform this loop forever
   {
     lcd.setCursor(0,3);      // column 1 line 4 of the display
     lcd.print("Counter =          "); // pad space to clear field
     lcd.setCursor (10, 3);   // where the 'count' will display
     lcd.print(count);        // display the counter value
     count++;                 // incerment counter by 1

     delay(500);              // wait .5 seconds
   }
}

// ------------- end of code --
|

Click to see full size with pinouts labeled. +Opens in a new tab. |
|

